
How to create a guitar pedalboard: in 5 easy steps
How to create a guitar pedalboard: in 5 easy steps
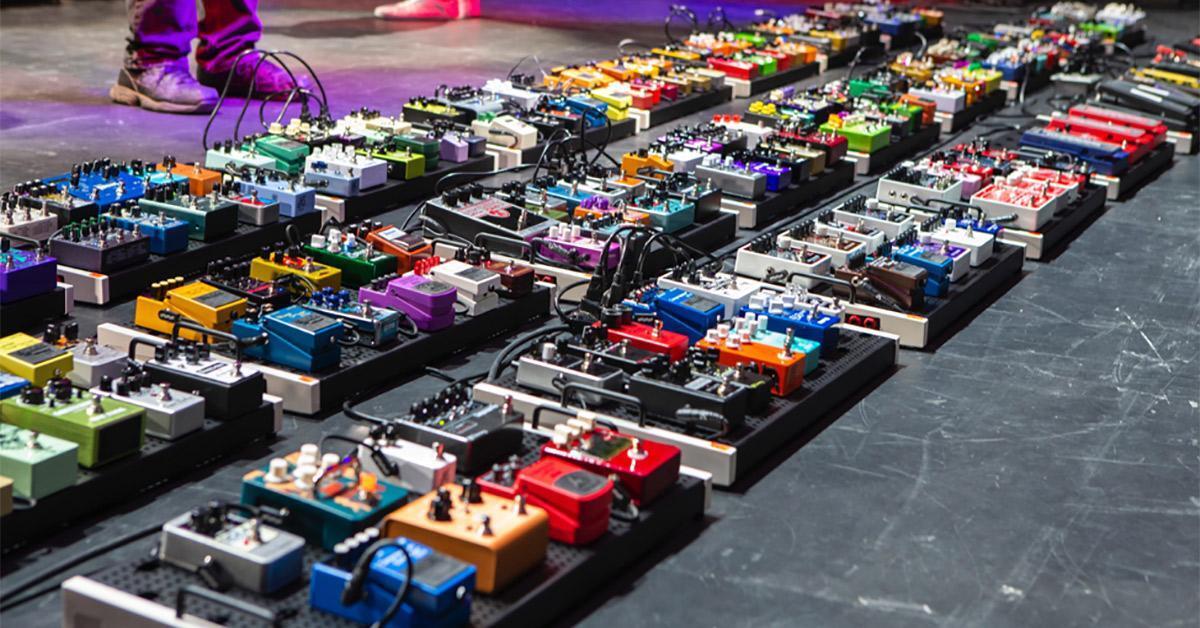
Building a guitar pedalboard is a crucial task for any serious guitar player.
Whatever the type of music we decide to play, we will always need to switch between different sounds, and in order to accomplish this goal, a professionally built pedalboard is what we need to be prepared for any situation.
The pedals we decide to buy and the way we wire them will enormously affect our sound, so we need a step-by-step technique to make a great-sounding, but also relatable guitar pedalboard.
In this article, I will explain to you how to create a guitar pedalboard in 5 easy steps and which are the components and the pedals to buy, and how to assemble them in the best possible way.
Affiliate Disclaimer: the links in this article are simply affiliate links, which means I will earn a small commission if you will buy something from the shop after you have been there. Nothing will ever change for you, and this is a way to monetize and sustain my blog activity.
The effect chain

First thing first, we have to understand how the effects chain works, as we can’t just link all the pedals together just like that. We need to follow an established order to take the best out of our pedals.
From the guitar to the amp:
Tuner
Volume Pedal
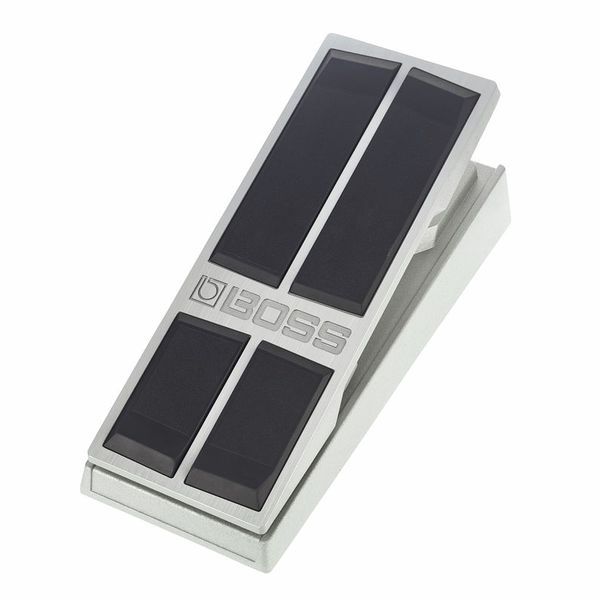
Wah Pedal
Fuzz
(1st buffer)
Compression
Overdrives and Distorsions
Equalizer
Booster
Modulations
Delay and Reverbs
(2nd buffer)
Guitar amp
It’s important to place the modulations, the reverbs and the delays AFTER the overdrive and distortion section, otherwise we will add distortion to the delay repetitions, to the reverb and to the modulations, creating a big chaos.
We want to keep our sound as clean as possible instead, even if effects like the Phaser can be used also before the distortions, to create an effect similar to Van Halen in Eruption.
Other than that, the two buffers, will help us in avoiding losing signal and high frequencies, especially if we use long cables. The buffers are another important tool we will discuss afterward.
1) The cables

The use of good cables is the first crucial factor in building our pedalboard.
It’s not worth at all spending a lot on boutique pedals if then we connect them through bad cables.
We have to use two types of cables: the connectors, meaning the short cables that are used to connect one pedal to another one. The long cables are the long cables that connect our guitar to the pedalboard, and the pedalboard to the guitar amp.
Another crucial factor to keep in consideration is the patch cables. They are the short cable that connects every single pedal, and more than everything, they will make a difference in the quality of the overall signal.
I recommend not neglecting them and investing the necessary amount of money in good quality, long-duration patch cables. These will be well spent and worth the money, and they will secure the quality of your sound and the reliability of all your system, especially in professional situations. Don’t be cheap in patch cables and connectors, they are as much important as your pedals and long cables, and you should take good care of them. Keep in mind that the jack should be L-shaped, so it will occupy less space on your pedalboard
I feel like recommending these two types of patch cables:
Ernie Ball Flat Ribbon Patch PB Pack
2) Pedals support
Ok, now that we have all the necessary cables, before choosing our pedals, we have to calculate the space we have available, we need a support to fix our pedals and keep them together.
There are many options out there, and the most important factor we have to keep in consideration is the robustness and reliability of our support, especially if we are going to fly around with our pedals and we need to protect them during travel.
I highly recommend the Daddario XPND 2 Pedalboard: it’s expandable support, robust and aluminum built. It can be modulated, expanded, or retracted depending on the number of pedals you will be hosting. Very practical and definitely not expensive.
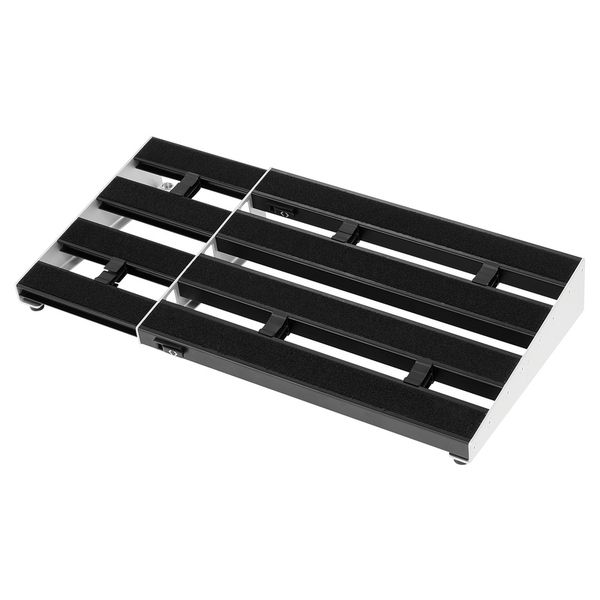
This pedalboard normally comes out also with its soft bag. I however recommend you evaluate buying a hard case. It will be worthwhile not only for protecting your pedals but also for the overall durability of the entire system. Especially for professionals, you have to have something you can count on, and you must be always sure that your system will work in any conditions.
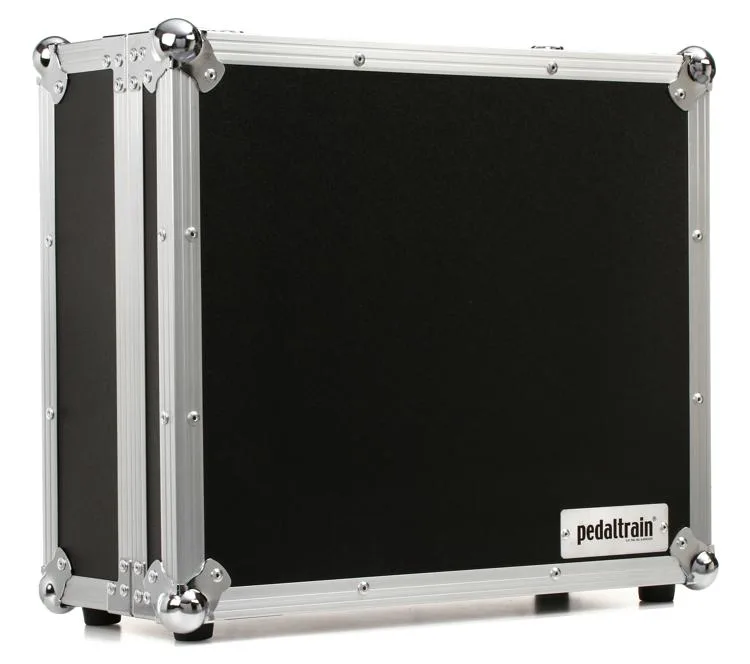
I recommend you the Rockboard Pedalboard w. Flight Case:
Link to buy in Thomann
Or the Pedaltrain Black Tour Case:
Link to buy in Sweetwater
3) Choosing the pedals
Let’s come now to the fun part: choosing the right pedals for our sound!
We virtually have tons of choices, but here I will try to give you my personal opinion of course, considering the pedals I have already worked with and the ones I find the best sounding, relatable, and good as a long term investment.
Wah Pedals
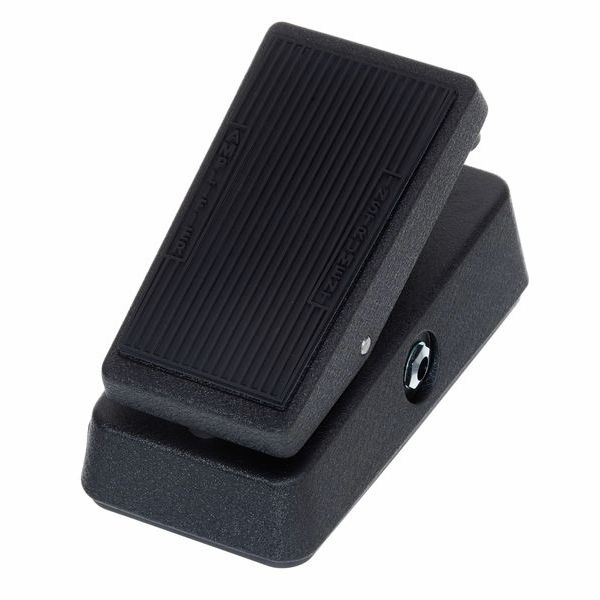
The Wah pedal is really iconic, made famous by Hendrix, used practically in any music style. It is used mostly for heavy rock and blues solos and for groovy funk rhythms. I strongly suggest a miny wah, it will fit your space better and it sounds great!
Volume pedal
The volume pedal is generally placed at the beginning of the effect chain, before or after the wah, as you prefer.
It is important to have one as it will allow us to fully control the volume output, unplug our cables securely, and create nice volume swells (which I like a lot to use!). It’s a must in any effects chain.
Overdrives and distortions
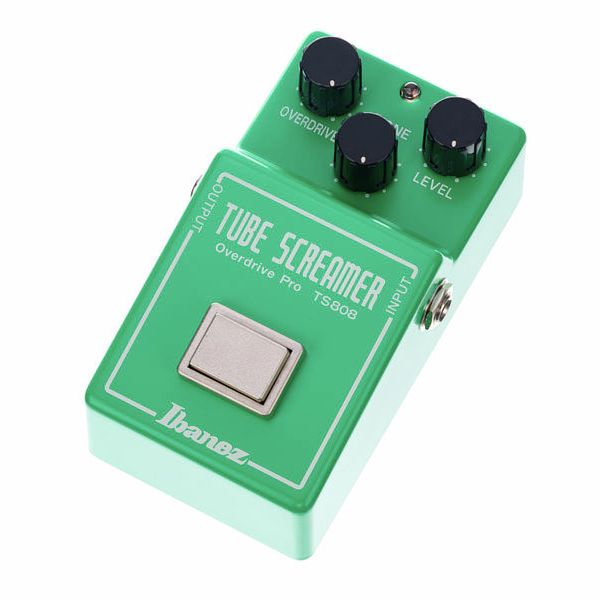
An overdrive pedal will add that hint of distortion to our solos or rhythms. Ideal for blues and soft rock parts, an overdrive is mostly used to add distortion to the channel lead amp for example, but it can also be used as a main source of gain. The Ts808 by Ibanez is my overall favorite: warm, round, and dynamic. It transforms every solo or rhythm into pure joy. It’s used basically by everyone, and it became famous after Steve Ray Vaughan started to using it.
The Ts808 is another must in any effects chain, the softest and warmest among all the overdrives. For sure, my favorite one.
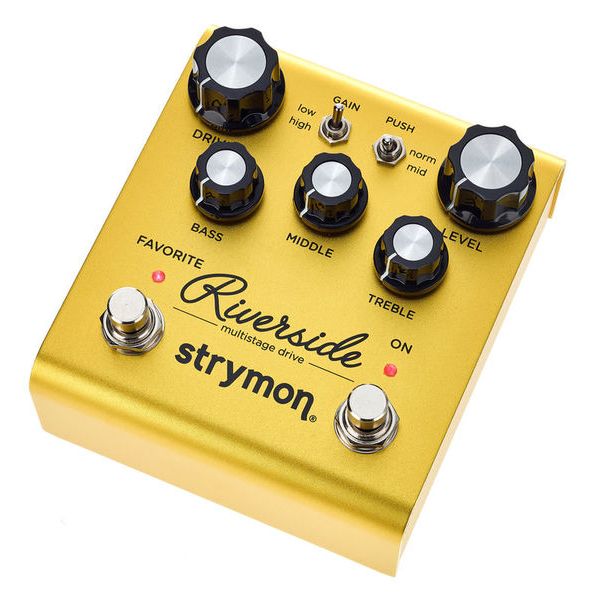
The distortion pedal is the core of any guitar player’s sound. A good distortion pedal will characterize our sound, and it will give a clear footprint to our identity as musicians. There are many distortions pedals out there, but my overall favorite is the Strymon Riverside. It is a boutique distortion pedal, able to re-create any guitar sound from blues and classic rock to metal and blues. It is dynamic and responsive, and all the frequencies are in the right spot to stand out during solos and play incredible rhythms.
Compressor
Compression pedals are way too often underestimated by guitar players, with the excuse that it is the pedal that “helps to cheat while playing”.
Compression pedals are instead very important: compression helps make the sound bigger during solos, and it helps during the rhythms to keep all the frequencies equal, sharp, and at the same level.
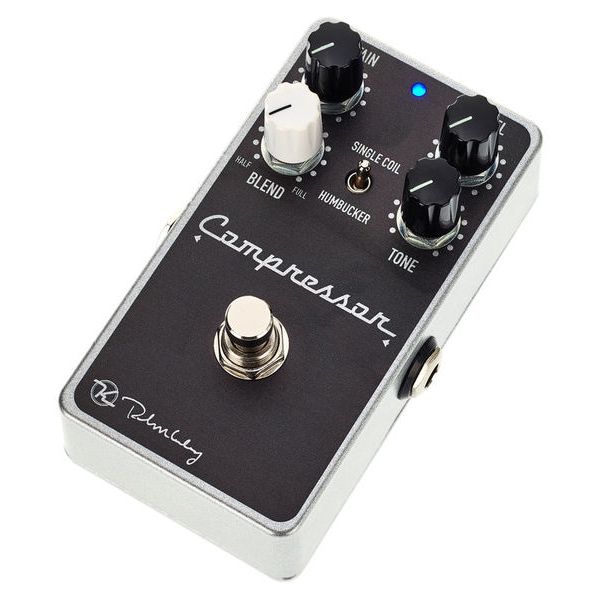
My favorite compression pedal is the Keeley Compressor Plus, and also the one I would advise you to have with you.
It’s important to mention other two alternatives:
Boss Compressor Pedal:
MXR Compressor
Booster
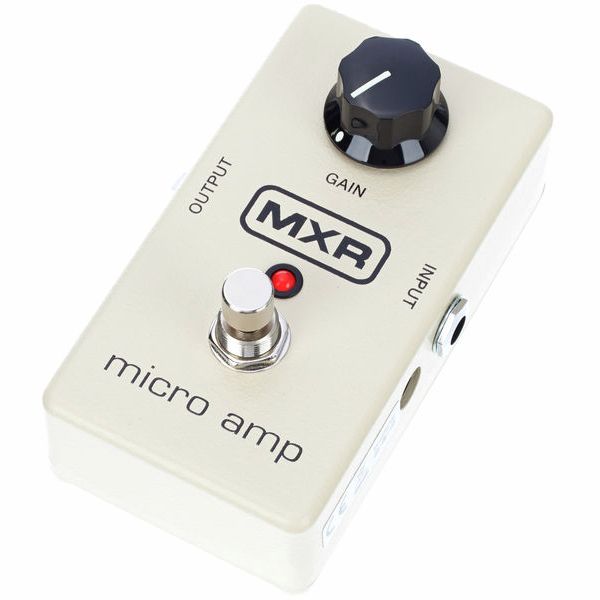
Another pedal I would never ever go without is a good booster. I always have one on my pedalboard for two reasons: the first one is that I need a volume boost during solos, otherwise I will be lost in the mix. The second one is that a good booster can help to increase the gain of overdrive pedals that need that additional push to have more sustain and distortion. It’s the case for my Ts808, which I sometimes boost with an MXR Micro amp. Not only do I have volume, but also an additional gain stage for a soft and warm pedal like the Ts808 or Ts9. You can’t go without once you try, trust me.
Equalizer
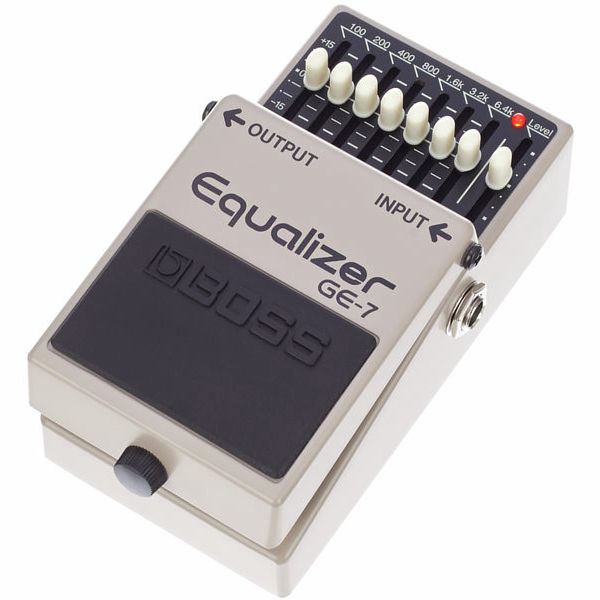
I consider the equalizer one of the most important pedals, if not the most important, of all the effects chain.
An equalizer will help you with boosting or cutting certain frequencies to better sculpt your sound.
I use it to boost middle frequencies during solos and to cut extremely high frequencies to not sound too fuzzy.
The Boss GE-7 also contains a booster knob to give more or less volume to the frequencies altogether.
An equalizer can serve a lot of different applications, and it can’t be missing among your best pedals.
Modulation Pedals
Modulation pedals are made to add colors to the guitar sounds, for clean crunches and distortions.
There are several modulation effects, but the most important ones are always:
Chorus
Phaser
Flanger
Tremolo
Uni-vibe
Let’s dig into every one of them:
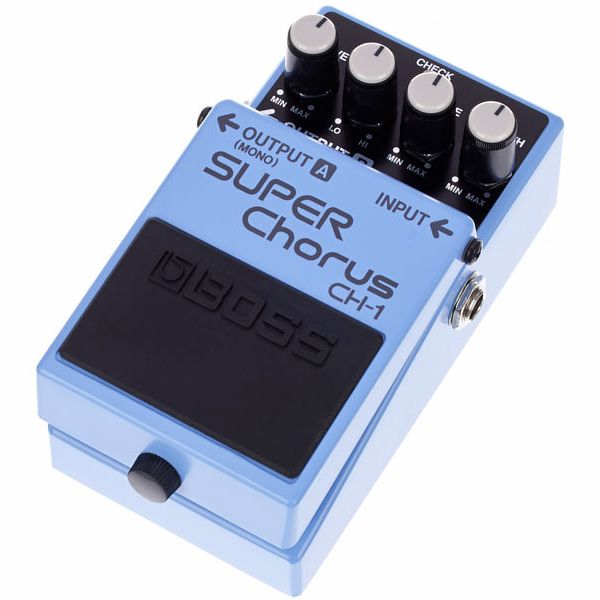
Chorus: is an effect that adds space, and dept together with a slight de-tuned vibe coming from slitting the signal in different sources. The result is small differences in pitch and length of the sound, that result in the classic chorus effect.
Chorus can be heard on the classic ’80 ballads’ clean sounds, but it is also used in metal rhythms to provide more space to the sound itself.
My favorite chorus pedal, and also probably the most famous, is the Boss CH-1
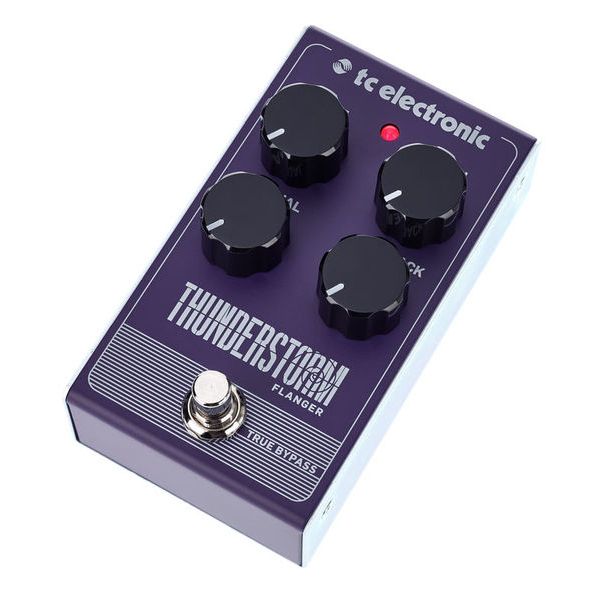
Flanger: it is a curious and cool effect, made to add that sort of rotating “jet engine” effect to the guitar sound. It has been used by Van Halen to create aggressive riffs like in the song “Don’t tell me”.
Best flanger pedal I would advise you to use is the TC electronic Thunderstorm Flanger
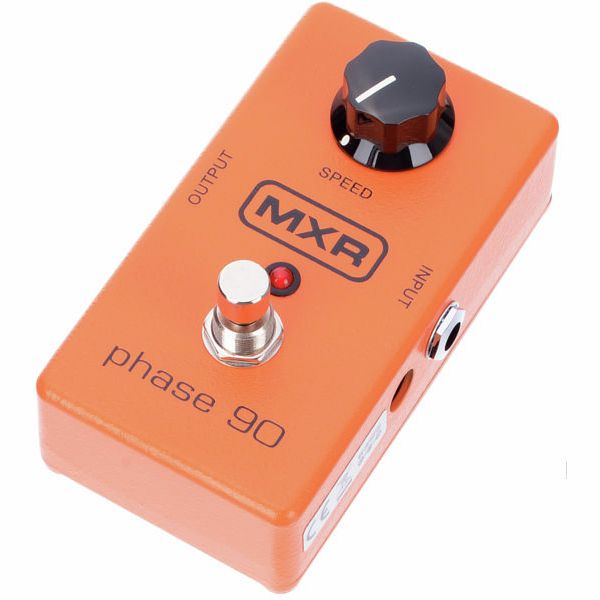
Phaser: Very similar to the Flanger effect, but more oriented to high frequencies. Phaser effect is super fun, and perfect both for funk rhythms and rock riffs. Phaser is also used in the super famous solo “Eruption” by Eddy Van Halen, and in the iconic song “Ain’t talk about love”.
The MXR Phase 90 is the absolute king when it comes to phaser pedals.
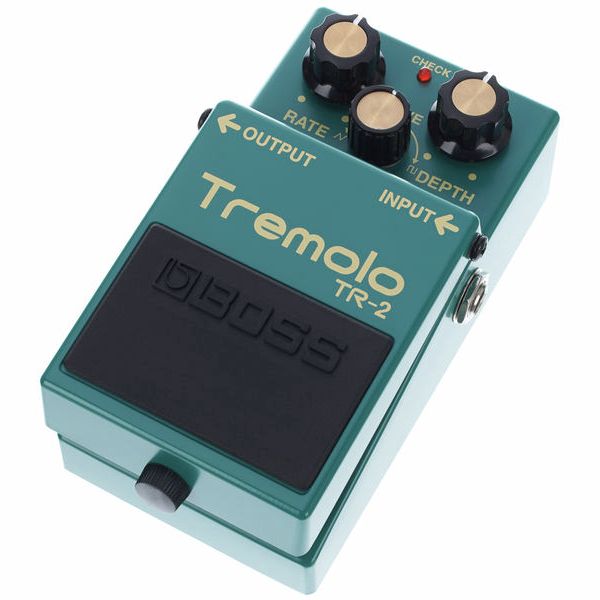
Tremolo: is an effect that comes from the momentary interruption of the sound, that produces a fluctuation in the volume of the sound being produced. It can be contained in an external pedal but some amplifiers, especially the ones inspired by the old amplifiers from the ’50 and ’60.
It’s a very simple, yet effective sound, that adds that vintage vibe to clean arpeggios. It’s been used a lot in Country music, Pop, Rock with some apparition in progressive Rock and Metal.
The pedal I would suggest you take a look at is the Boss TR-2
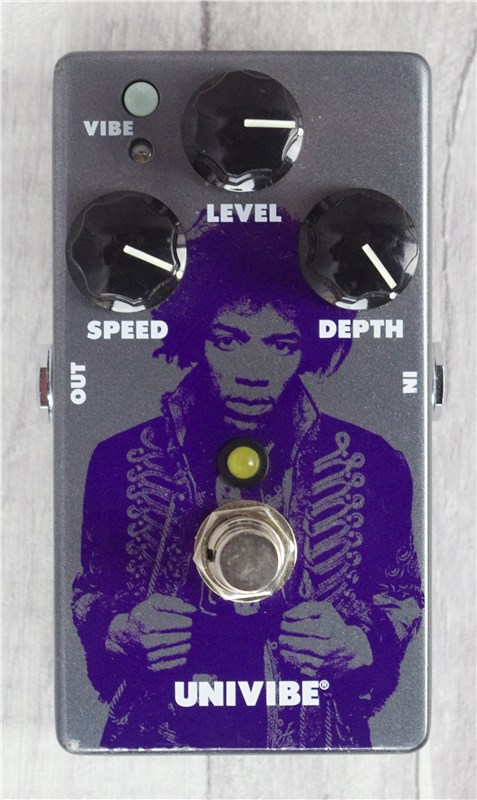
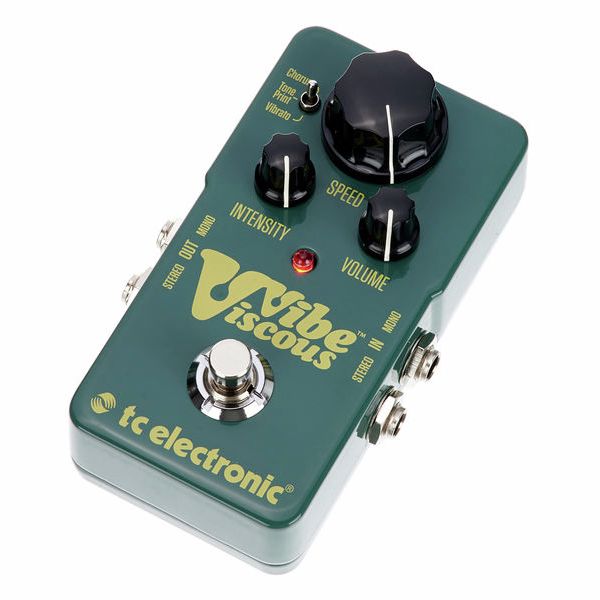
The Uni-Vibe is another fantastic effect, made famous by Hendrix in particular, and then used by many other blues players. It is an effect that sounds more or less like a tremolo and a phaser combined, and it creates a sort of rotating-windy effect that adds space and breadth to the guitar sound.
If you want to listen to the Uni-Vibe sound, take a look at the song “Angel” by Jimi Hendrix or “Secretly” by Skunk Anansie.
My personal choice would go to the TC Electronic Viscous Vibe:
Modulation effects are way too different to be described, there are several variants of the same chorus, or different types of uni-vibe or phasers.
Since it becomes cumbersome to host so many pedals in one single pedalboard, I strongly suggest you to invest in a solid small unit the reproduces all the modulations you need.
You will have more options, you also will save money, and you will have the best results in return.
I strongly recommend the Strymon Mobius. Strymon is one of the top companies in the market for effects and the Mobius is probably the best machine for modulation effects out there. 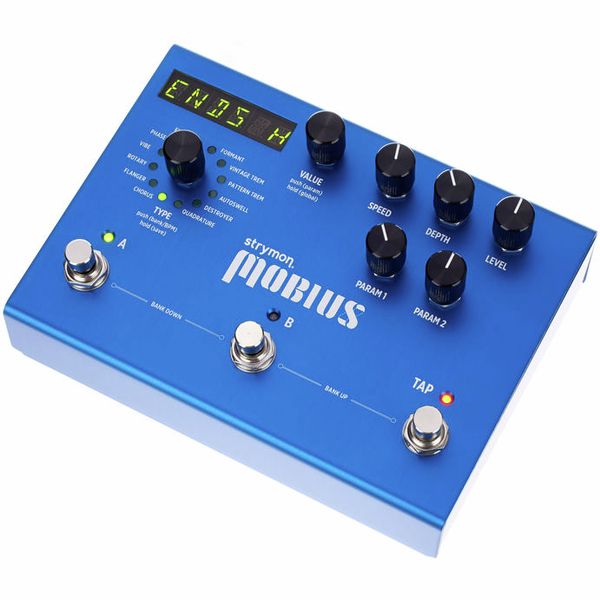
Delay
The delay is an effect that every guitarist should always have in the arsenal.
It reproduces the sound of the guitar multiple time, creating an echo effect that can be altered, modulated, and repeated infinitely if wanted.
Delays will provide an additional layer of sound during our solos, providing depth and expression to every note we play.
Delay can also be used to create ping-pong effects and soundscapes, and I suggest listening to the guitarist The Edge from U2 to have a clearer idea of what I am talking about.
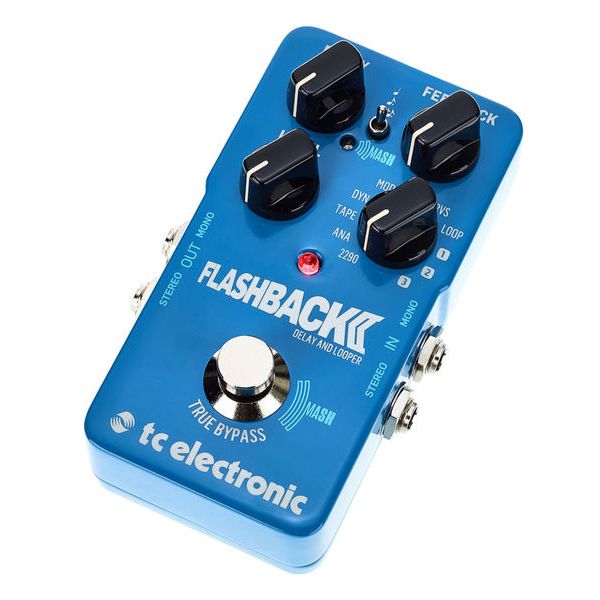
The TC Electronic Flashback is my first choice when it comes to a delay single pedal:
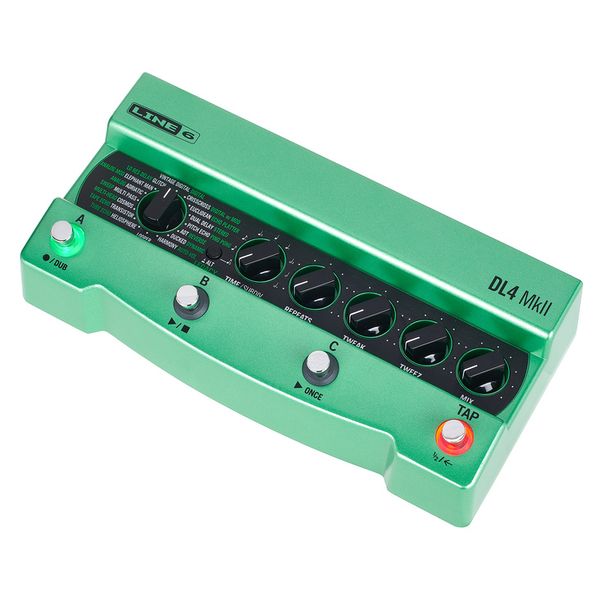
As I did for the modulations, also in this case I strongly advise you to make a long-term investment over a delay unit that will last in time, and that will let you have all possible delay variations for any use.
A good example is the Line 6 DL4 Mark II Delay:
Reverb
Reverb is another effect that should not be missed in any pedalboard. Wheter or not you just decide to use the one in your amp, or you decide to have reverb on a pedal, a guitar sound that is completely dry will most of the time be awful to listen to.
Reverb is very important in solos, clean arpeggios, long rhythms and soundscapes.
There’s no limit to what we can create with reverbs, even if we have to be careful with the amount of reverb we will use in certain situations.
As a general rule, reverbs should be pondered considering also the ambient in which we will perform. Reverbs used in small clubs would be slightly different from the ones used in big arenas.
In any case, it’s an effect that no guitarist should be missing.
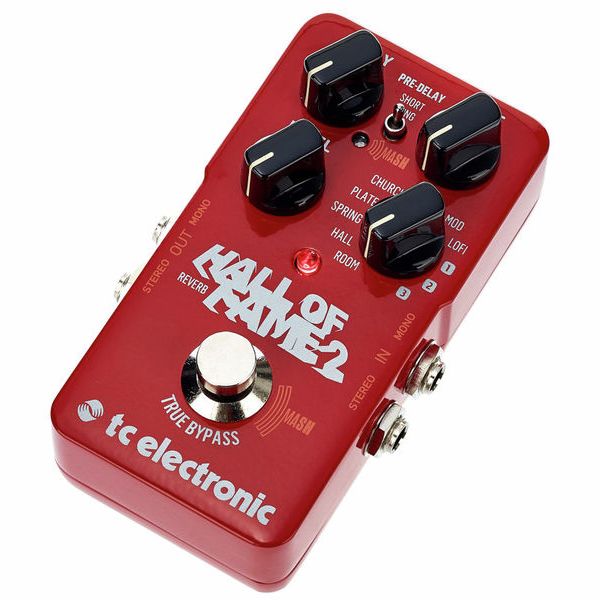
The TC electronic Hall of Fame 2 would me my favorite choice as a single pedal:
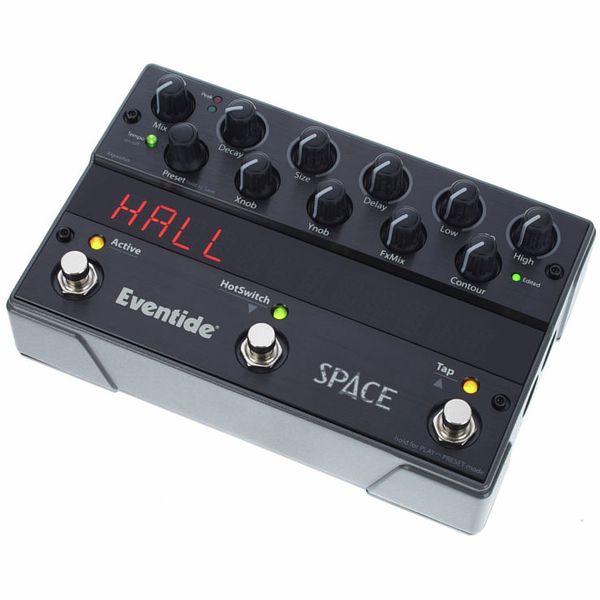
If you are searching for a pedal that will give you all the best possible reverb algorithms to create ambients, soundscapes and also fit in your studio in case you would need an upgrade.
The Eventide Space would be my #1 choice:
4) Buffer
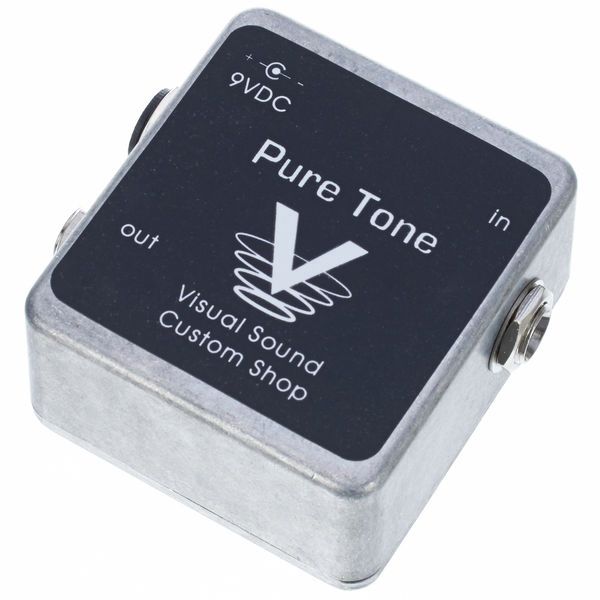
A buffer is a pedal that integrates a circuit that helps maintain the clarity of the guitar signal when it passes through multiple pedals and long cables.
Long cables, pickup loading, and the impedance of the pedals can easily degrade the signal.
The buffer helps counteract these effects by amplifying the guitar signal and driving it with a high impedance, effectively “re-buffering” the signal. This ensures that the tone remains consistent and transparent, even with multiple pedals in the chain and long cable runs.
Using a buffer as the first pedal in your chain and before the amplifier can greatly improve the overall tone and signal quality of your guitar rig.
I strongly advise you to have a buffer with you whenever you connect many different pedals. You can also use the TC Electronics Tuner and Buffer, to have everything integrated into one single pedal:
5) Power Supply
Now we finally have all our pedals, we have to fix them on our support, and we have to ensure their power supply.
The power supply is another tricky part, as we have to be sure that it is not only able to provide for all the pedals, but should be high quality, well shielded, and secure in any situation.
Another important factor to take into consideration is that the power supply should be silent. Especially with overdrives and distortions, the amount of noise can grow exponentially if the product is not high quality.
I strongly recommend a high-quality supplier to be sure that in any gig not only you are protected, but also your signal won’t be noisy and messy, and as a consequence will compromise the overall quality of your performance.
The Strymon Zuma would definitely be my first choice as a power supply for my pedals:

And how do you wire your pedals? Do you have any more suggestions? Let me know in the comments!!
About me
My name is Ignazio Di Salvo, well, Iggy for all my friends as my name is difficult to pronounce for non Italian speakers.
I am an Italian Guitarist, Singer, Composer, and Music Educator living in Belgium.
I am passionate about music production and writing, I publish two articles every new week about music and music production-related topics.
Disclaimer: the links in this article are simply affiliate links, which means I will earn a small commission if you will buy something from the shop after you have been there. Nothing will ever change for you, and this is a way to monetize and sustain my blog activity.